Although I had more than enough room remaining on the 250GB Serial ATA drive that came with my MacBook Pro, I decided to upgrade the hard drive to a 500GB 7200 RPM drive. My main reason for doing this is that I wanted a faster drive, since the previous drive ran at 5400 RPM. After some research, I decided to go with the Hitachi Travelstar 7K500. I purchased the drive and an Acomdata Tango USB & Firewire enclosure from my favorite place, Newegg.
This was my first time upgrading my MacBook Pro, which is a mid-2009 Unibody edition. The process was very easy, except for the fact that I didn’t have a Torx screw driver, which is needed for the hard drive, but thank God for New York City, and the 24 hour Best Buy not too far from me. Where else can you go at 12 midnight to purchase a screw driver kit? Anyway, below are the steps I took to upgrade the hard drive. I’ve also included a few screen shots to serve as guidance.
In preparation you will need to do the following:
- Download and install Carbon Copy Cloner. Also, please show your support by donating to this incredible useful tool.
- Read ifixit for instructions on removing the hard drive for your particular model.
- Before proceeding, it is wise to create a backup of your current drive. I didn’t do this, but it’s probably best to do, just in case something goes wrong.
To upgrade the hard drive I did the following:
1. Format the new disk drive
- Connect the new drive, via enclosure, to the machine.
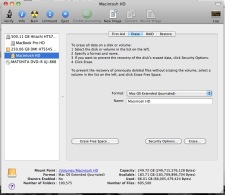
- Open Disk Utility, which can be found under the Applications->Utilities folder.
- Select the new drive, and click the Erase tab.
- Select “Mac OS Extended (Journaled)” as the format, and give the drive a name.
- Click “Erase“.
2. Repair permissions on the current drive
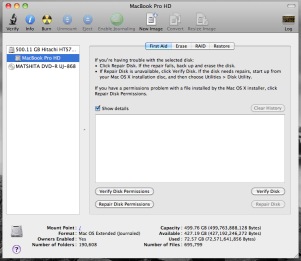
- From Disk Utility, select your current hard drive.
- Click “Repair Permissions“.
3. Clone the current hard drive to the new drive
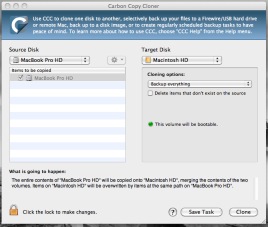
- Open Carbon Copy Cloner, which should have been installed to the Applications folder.
- Select your current hard drive as the “Source Disk” and the new drive as the “Target Disk“.
- Select “Backup Everything” for “Cloning Options“.
- I left “Delete items that don’t exist on the source” unchecked.
- Verify that it says “This item will be bootable“.
- Click “Clone“.
- (Optional) After the drive has been cloned. I went back to Disc Utility, selected the new drive and click “Repair Permissions“.
4. Boot to the new drive to ensure that it works
- Reboot the machine, immediately holding down the “Option” key.
- The “Startup Manager” screen will appear.
- Select the external drive as the boot drive.
Note: This may be a slow process. At least I found it a little painful.
5. Replace the old drive with the new one
After verifying that the clone copy works, remove the old hard drive and install the new drive.
I hope you find this helpful. Have fun!


